The rise of the fashion blogger has seen more and more people interested in creating their own blog, but lack of time or technical knowledge quickly puts people off.
Well in today’s article (and video) I wanted to solve both those issues, by showing you how to set up a fashion blog with no experience needed… in less than 15 minutes.
With a video demonstration, alongside a visual step by step guide making your own fashion blog has never been easier.
To get started, you’ll need:
1. A Domain Name & Hosting – I get both from Bluehost.com.
2. A Topic For Your Blog
3. A Spare 15 Minutes
4. $17 For Set Up Fees
By the end of this tutorial, you’re going to have your own blog set up and ready to start blogging. You’ll have your own .com domain, and it will be run on the ever popular platform WordPress.
If you’re ready to set your fashion blog up, here’s the steps you need to take.
1. What Are You Going To Blog About?
Tutorial aside for the minute, what is your blog going to be about?
To be a successful fashion blogger, keeping your blog fresh and updated really is key. Therefore you need to base your blog around a topic you’re passionate about.
You also need to think about how broad your topic and blog posts are going to be. The more specific the better. Instead of deciding to make a blog about ‘women’s fashion’, why not create a blog around a specific trend or target a certain demographic (e.g. over 40’s).
The more specific the direction of your blog, the better chance of success.
2. Register Your Domain Name & Hosting
The second step is to buy your domain name.
I always suggest not settling for anything less than a .com. Yes, your desired name might not be available but don’t settle for a .org, .net or .info. Is there another alternative domain you like available as a .com?
The shorter the better, and the more rememberable the better.
Also if you’re looking to target just a specific country, opt for that domain (e.g. .co.uk if you’re targeting UK visitors).
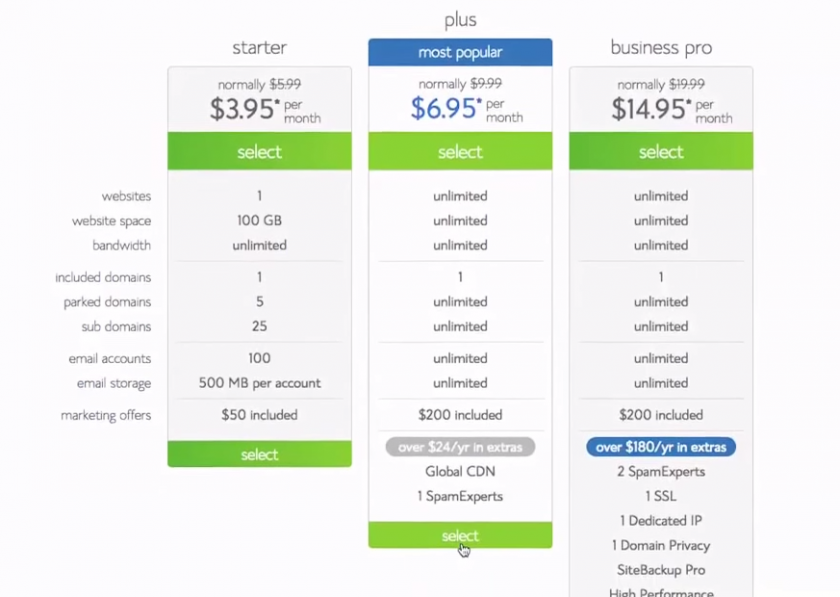
Head over to Bluehost.com and hit Get Started Now.

The Starter package is fine though, and as I’ve recommended before starting basic and then upgrading when you need too often is a sensible approach.
Preparing a launch or expecting a lot of traffic when your blog goes live? Invest in the Business Pro or even a dedicated server so your blog doesn’t crash.
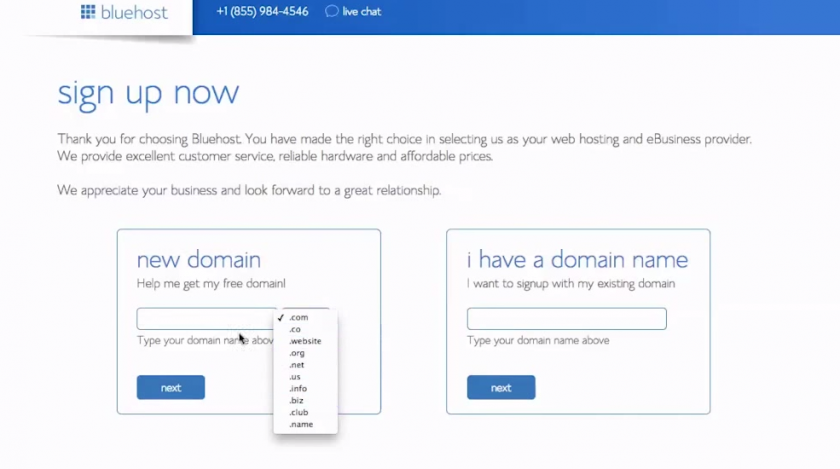
You’ll then be directed to the Domain registration page.
Enter in the blog name you want and select .com. You’ll be advised via Bluehost whether the domain is available or not.
If you’ve registered your domain name somewhere else, type it in to the ‘I have a domain name’ field.
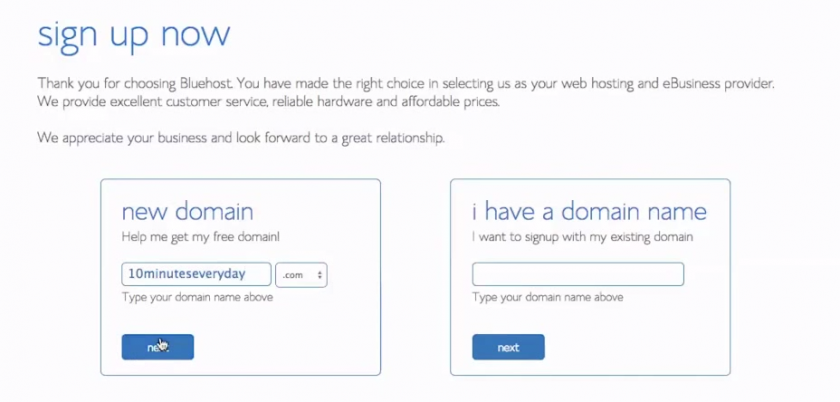
You’ll then be prompted with a registration form and payment form. Simply complete the required fields.
3. Hosting Set Up Completion
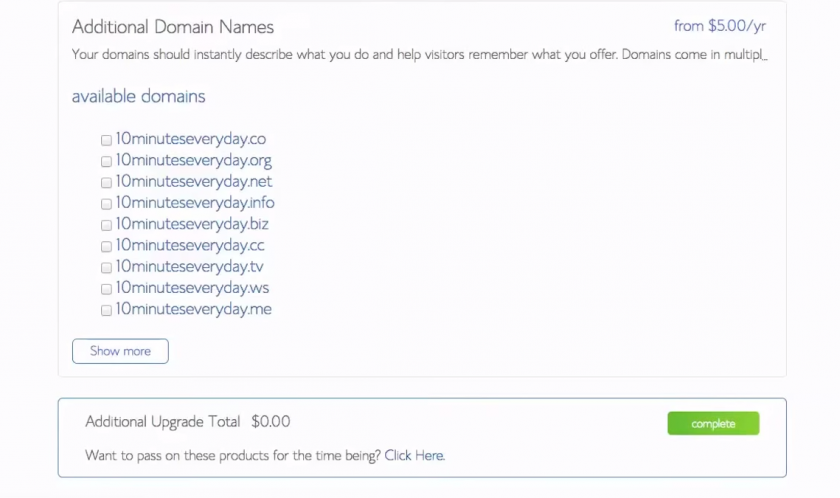
After registering, you’ll be offered with various up-sells. I tend to un-tick all of these, but sometimes (depending on your needs) you might want to purchase them.
Hit ‘Complete’.
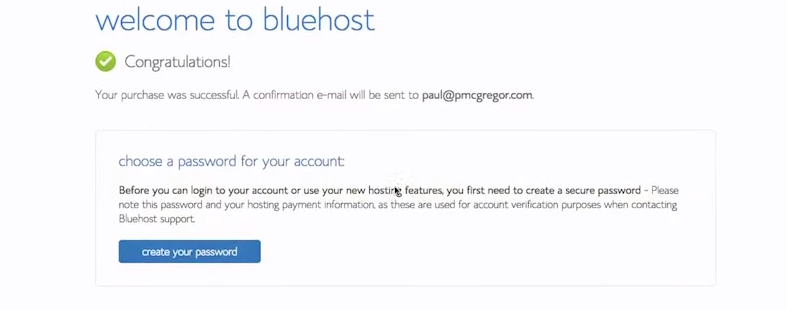
Your set up is then complete, and you’ll see the following message.
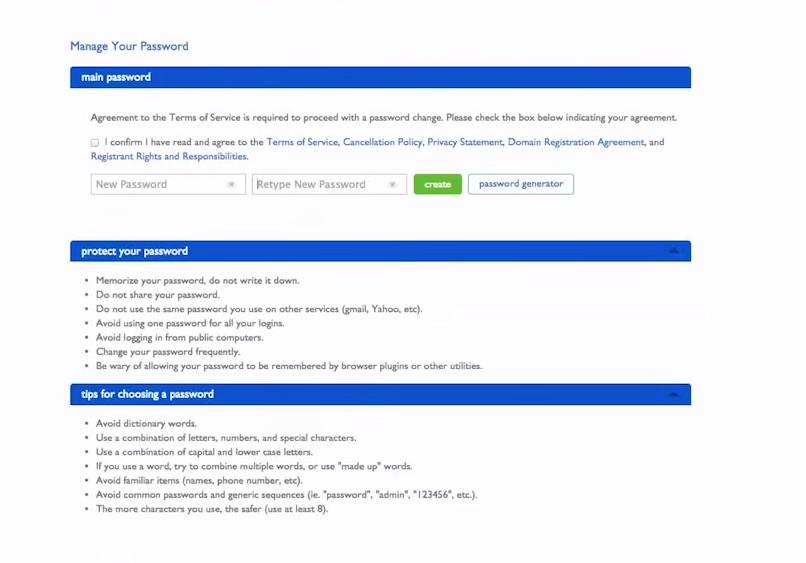
4. Set Up Your Hosting Password
Next you need to create a password for your hosting account. Just click ‘Create Your Password’.
You can also use the Password Generator provided by Bluehost.
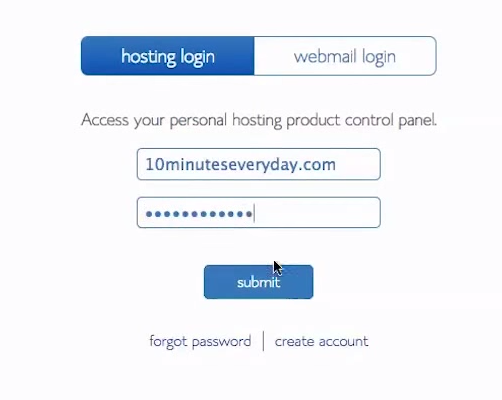
5. Login To Your Hosting Control Panel
When complete, you’ll then be taken to the hosting log in screen. Simply enter in the password you just created.
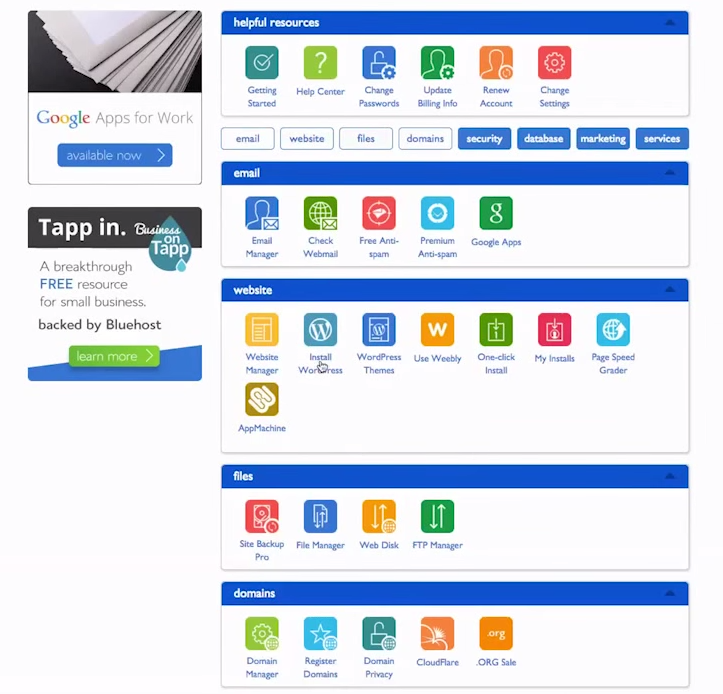
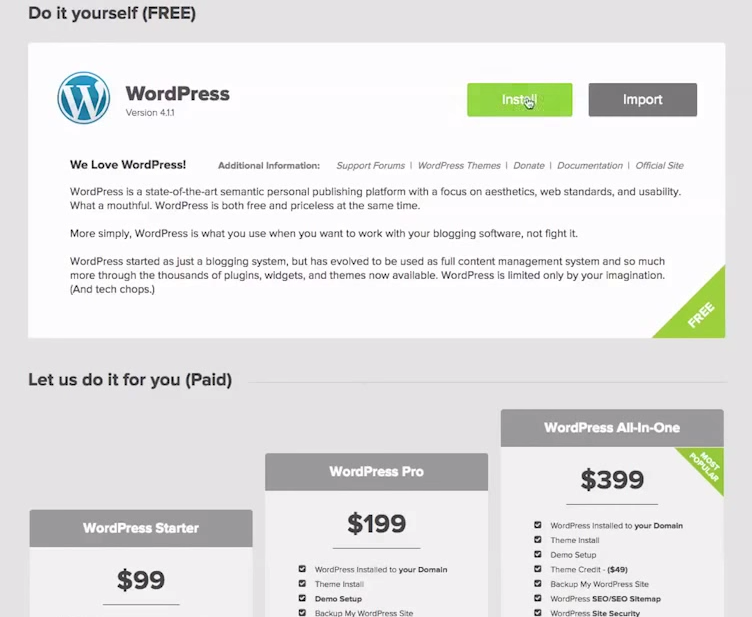
6. Install WordPress
The next step is to install WordPress. This is the blogging platform we’re going to be using, and again it’s extremely easy to use and set up.
When logged in to your Hosting Control Panel, you’ll see the option ‘Install WordPress’.
You guessed it, click the icon.
For this we don’t need this, and we’ll simply just click ‘Install’.
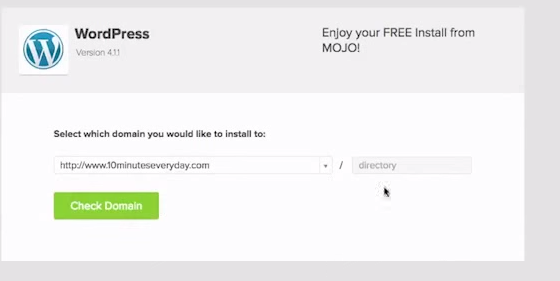
To start with, choose where you want your blog to be hosted.
If you want it to sit on your main domain name (most likely) leave the ‘Directory’ field blank. If you want something else stored on the root domain (like a holding page, a services page or a online store) type the desired installation directory into the ‘Directory field’. For example: /blog.
I normally just install it onto the main site as WordPress has unlimited capabilities for any type of website. Therefore I leave the ‘directory’ field blank.
Click ‘Check Domain’.
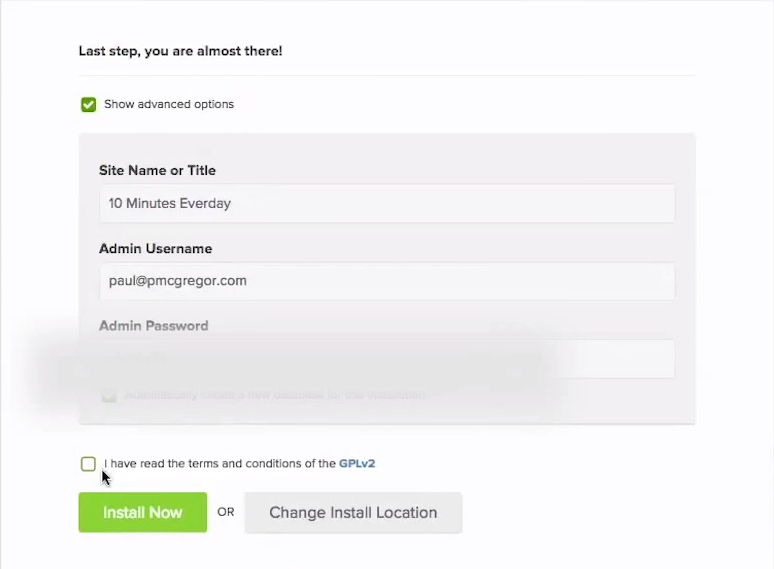
I click ‘Show Advanced Options’ and fill in the required fields.
Remember the username and password, as this is what you’re going to use to log in to your blog to make changes and publish posts.
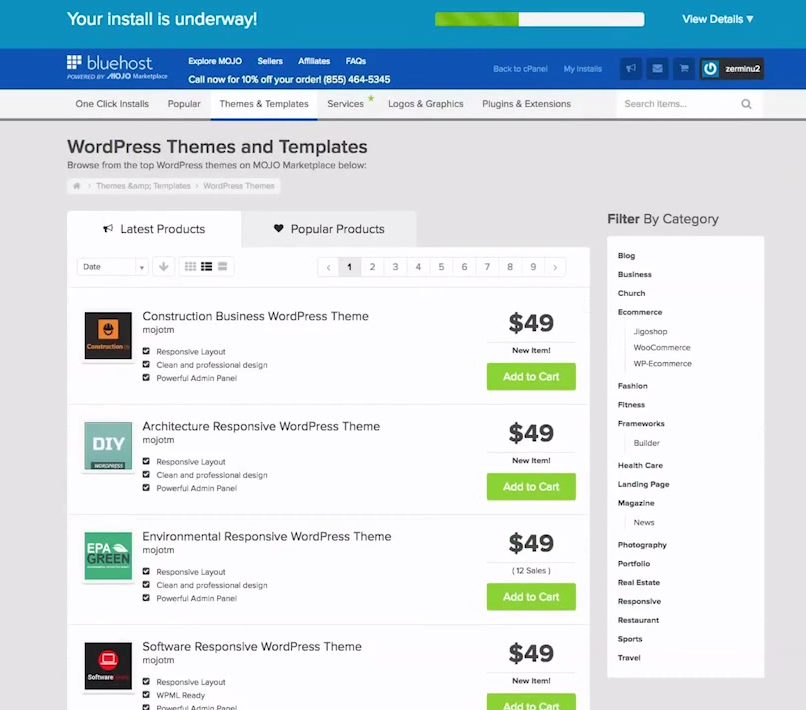
Your WordPress installation will automatically happen. There’s nothing more to do there 🙂
You might want to browse through some of the themes from MOJO, but in this case I skip them as I’m going to use a free theme from WordPress.
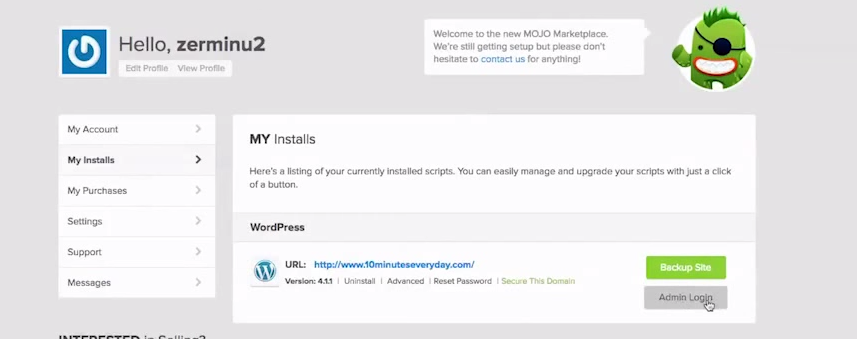
You’ll see the following screen, and the next step is to click ‘Admin Login’ and start making changes.
7. Customise Your Blog
Now we need to customise the way your blog looks, and most importantly, start publishing our blog posts.
Once you click ‘Admin Login’ you’ll be directed to the WordPress admin panel.
You’ll want to provide the username and password you previously created.
You can also go to yourblog.com/wp-admin (replace yourblog.com with your domain name) for future access.

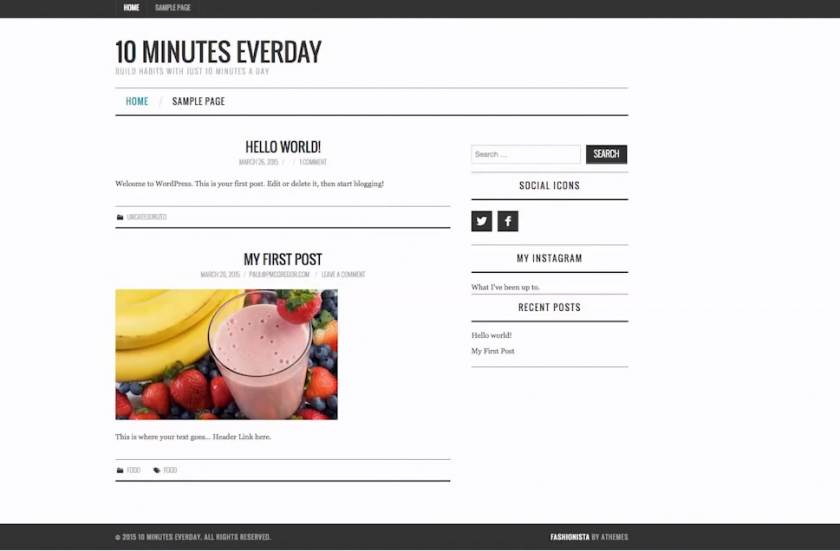
That’s it! Your blog is now set up and you’re ready to customise the way it looks and start blogging.
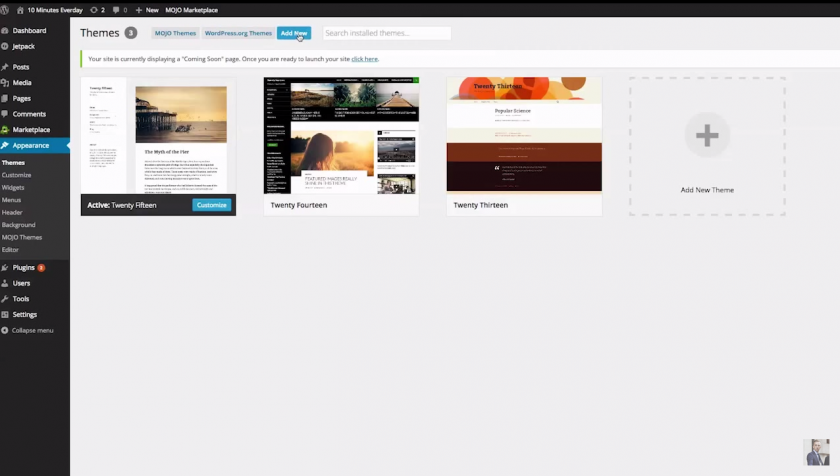
8. Change The Theme
The built in theme isn’t the best, so we’re going to change it.
There’s a lot of themes online which you can download and install, but I’m going to use one which is already provided by WordPress.
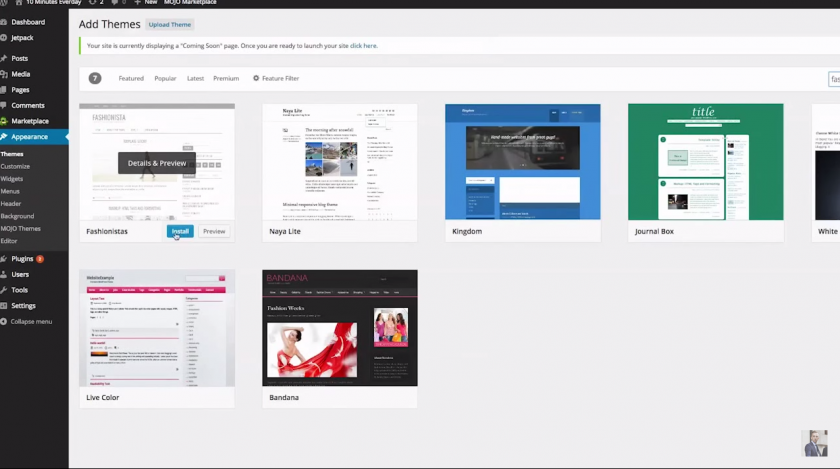
On the left hand panel, go to Appearance and Themes. You then want to choose Add New.
Click ‘Install’ and then ‘Activate’. This simple change will redesign the look of your blog.
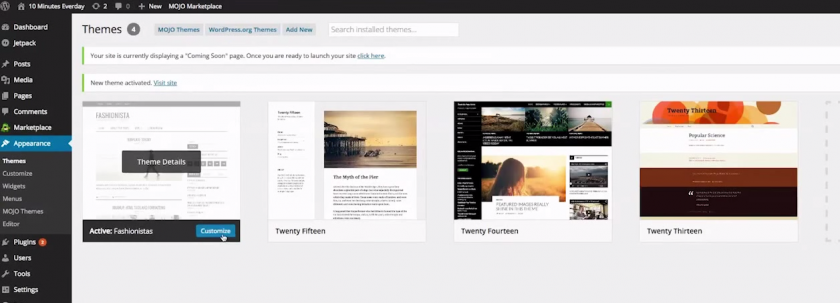
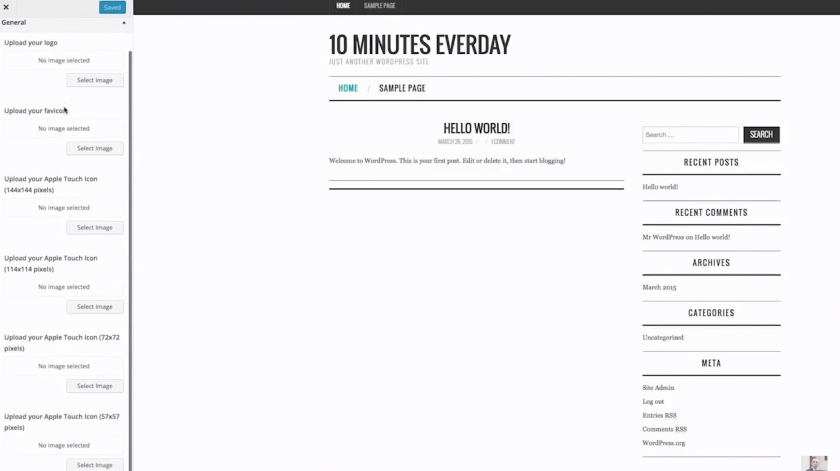
9. Personalise The Theme
Once installed and activated, click Customize.
10. Change Your Permalinks
Permalinks is basically the URL structure of your blog.
You don’t really need to understand it, but failing to change it will leave you with some ugly looking URL’s for your blog posts.
Go to Settings > Permalinks.

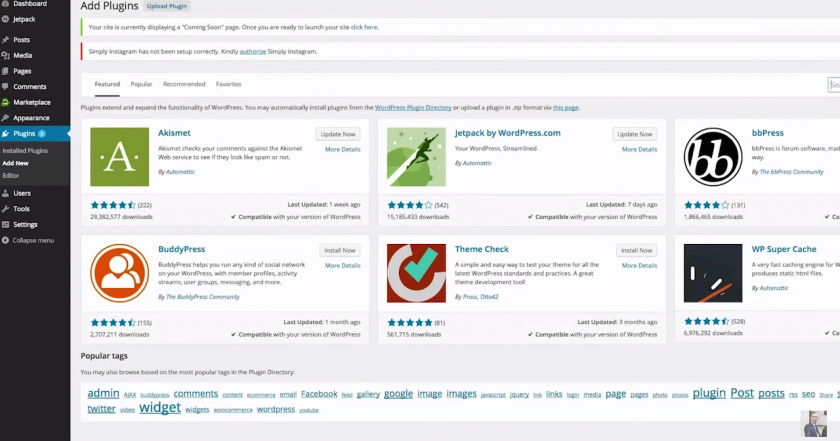
11. Add Required Plugins
WordPress offers a wide variety of plugins to improve your blog. Plugins simply are additions to your blog, and all serve different functions.
There’s plugins for SEO management, social media integration, fashion plugins and more.
Search through and to add one simply click ‘Install’.
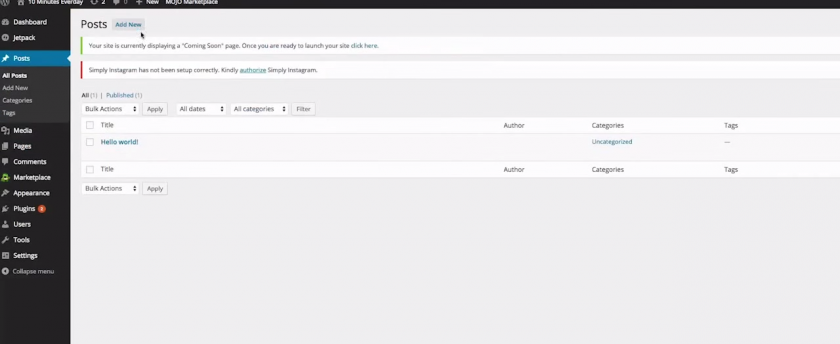
12. Add Your First Post
To add your first blog post, go to Posts > Add New.
It really is easy, similar to a word document, what you see is what you get.
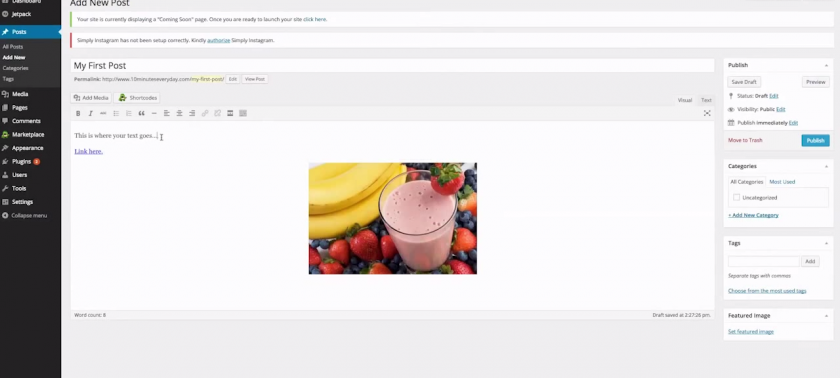
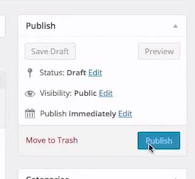
I can Add it to a category, add tags, add a featured image and then Publish it.
13. The Finishing Touches
Of course, this is done extremely quickly by me and isn’t the standard I’d leave it with.
I recommend creating a menu, customising the theme further and adding some more blog posts in.
Create an About page (very important), a contact page and more.
Easier than you thought?
Any questions, comment below.
Sign up at Bluehost here.
Subscribe to my YouTube channel.
Don’t forget to share this if you found it useful.


[…] offering value on there. Periscope. You can create a blog. You know, go to YouTube and search “How to Make a Blog”. There’s a video by me on there. There are also other videos of me if you want to watch those […]
[…] Admin 7 mins ago 0 View Share Tweet Pinit Google+ Email […]